"oh really, you were on the phone??"
(he knows I don't like talking on the phone)
"umm no I mean I was ichatting, or emailing"
"that's not talking..."
So you tell me dear readers... is ichatting and emailing talking ... or is talking only on the phone or in person???
OK that was totally not where I was heading with this post... back to me being a dork and talking with Jeanne. I was telling her about this AMAZING vest I made, and that it only took 5 minutes to make... and you make it out of a tshirt... yes I'm realizing how fanasticly awful this is sounding.. but stay with me.
Her response: "The vest sounds... interesting. Based on your description, I feel like it's one of those things that could go either way. It could be freaking cool or a Gr3 art class project. Not that you can't make cool things when you are in Gr3.... Either way, I'm looking forward to seeing the post."
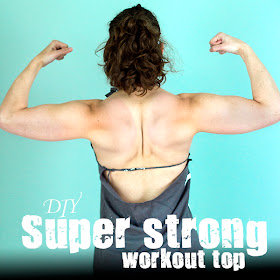
So Jeanne... this one is for you!! No grade 3 art project here! 3 steps and all you need is a old large t-shirt (hint: go into your husbands closet and steal one). It can have an image on it for added flare, or it can be a straight up blank one like I used here.
 Slice your tshirt straight across right under the arm pits (lay flat on a table and cut through both layers). If using hubbies shirt.. make sure to cut below any nasty pit stains ;) (Warning: do not cut shirt while still wearing it!) You will now have a tube...next slice it up the side. Your tube will now be a long rectangle. (you don't use the top half of the shirt you cut off)
 Lay your rectangle of fabric flat and then slice a straight line in the center as shown below... the length will depend on how wide your back is. I cut my hole to be around 18-19 inches. Remember this is tshirt material... so it may stretch out some, so error on the small side (you can always cut it a little bigger)
 OK you're done! Put it on and go out on the town looking super cute! The edges will be unfinished and roll a bit, if you are feeling spunky you can use a serger sewing machine to finish the edges... I say screw it, it's adorable as is! (both arms go through the hole you cut in step 2, the thin part on the top is what wraps around the back of your neck)
 So the idea for this came from a friends blog post (thanks Vanessa!)... and she got the idea from here(scroll to bottom of post). The making it out of a tshirt was my random idea... since I'm a dork... See, we've come full circle!
Like this post? Check out my newest T-shirt redo!
"is ichatting and emailing talking ... or is talking only on the phone or in person???"
ReplyDeletePersonally, I considering email/iChat just to be CORRESPONDING; and then phone/in person to be actually chatting. That's just me though :-D
Thanks for the tutorial!!
That's actually quite cute Steph!
ReplyDeleteOh, and emailing, IMing, texting... is all "talking"
I'm with ya girl -- i am not one who likes to chat on the phone. Texting on the other hand? I'm addicting.
ReplyDeletethanks for the how-to :) I have some old shirts laying around just waiting to be vestified! :)
You crack me up! The diagrams are adorable.
ReplyDeleteI *LOVE* it!!! Totally not a gr3 art project. It's fab! Too bad I don't have a husband to steal a shirt from...
ReplyDeleteAnd I feel like a broken record saying this, but TWINS! I don't like the phone either. I avoid it whenever possible. I'm sort of notorious for it actually. So I definitely consider emailing to be talking.
Love the shirt. Love the post. Fun! :)
ahhh whatever, it's still talking if it's through chat or something. haha i'm not picky with my definitions ;) Cute vest!
ReplyDeleteSo cute!! I'm very impressed - such a clever idea!!
ReplyDeleteI completley, 100% agree with you - emailing, texting, and anything of the sort is definitely "talking!" :-) I'm not a huge phone fan either - talking on the phone usually just makes me wish I was talking to the person in person, so I "talk" via texting and email allll the time... :-)
This is very funny ;-)
ReplyDeleteVaggieGirl- darn siding with John I see!
ReplyDeleteMags- thanks! woohoo score one for me!
Jenny- post back pics once you make it!
outoftherabbithole- thanks :)
Jeanne- ahhh my twin! we rock!! I can't wait to see you in Nov!!
Anne- I'm so winning this talking fight :)
Astra Libris- Score another one for me!
Juliana- so does that mean you are voting for john or me? :D
You're so creative! This reminds me of the time I tried making a shirt out of a plastic bag when I was 4.. but totally cooler!
ReplyDeletesure is talking!! I feel like I'm talking to you & I'm all the way Down Under :)
ReplyDeletenice bit of craftiness there too.
have a great weekend ♥
ichatting is way better than talking on the phone!
ReplyDeleteWhat a clever and cute idea with the t-shirt - I love it.
What a cute idea!! I love it!
ReplyDeleteHow incredibly cool! That's my vest you've copied, and I actually bought a bunch of jersey knit ti make more myself ... but my efforts involved lots of amateur missteps. Love this easy, effective pattern.
ReplyDeleteI love the vest idea! So cute.
ReplyDeleteAny sort of email/chatting/texting is just.... that in my head. Although, I definitely say 'talk' in conversation!
Hey, can you post a picture of the back of the vest. It seems very simple, but I feel I am missing a step or something (or just plain jittery bcoz I have never done such crafty stuff before). It will be nice if you could post a picture of the back. I'm new to this blog and I enjoyed it very much. Thanks for the tutorial. :)
ReplyDeleteCheers,
M
I'm out of town but will try to post a pic of the back once i'm back, it's kinda like a halter where it goes around your neck and then the rest sits lower on your back if that helps at all!
ReplyDeleteHow incredibly cool! That's my vest you've copied, and I actually bought a bunch of jersey knit ti make more myself ... but my efforts involved lots of amateur missteps. Love this easy, effective pattern.
ReplyDeleteichatting is way better than talking on the phone!
ReplyDeleteWhat a clever and cute idea with the t-shirt - I love it.
You're so creative! This reminds me of the time I tried making a shirt out of a plastic bag when I was 4.. but totally cooler!
ReplyDeleteThis is very funny ;-)
ReplyDeleteSo cute!! I'm very impressed - such a clever idea!!
ReplyDeleteI completley, 100% agree with you - emailing, texting, and anything of the sort is definitely "talking!" :-) I'm not a huge phone fan either - talking on the phone usually just makes me wish I was talking to the person in person, so I "talk" via texting and email allll the time... :-)
I *LOVE* it!!! Totally not a gr3 art project. It's fab! Too bad I don't have a husband to steal a shirt from...
ReplyDeleteAnd I feel like a broken record saying this, but TWINS! I don't like the phone either. I avoid it whenever possible. I'm sort of notorious for it actually. So I definitely consider emailing to be talking.
Love the shirt. Love the post. Fun! :)
That's actually quite cute Steph!
ReplyDeleteOh, and emailing, IMing, texting... is all "talking"
"is ichatting and emailing talking ... or is talking only on the phone or in person???"
ReplyDeletePersonally, I considering email/iChat just to be CORRESPONDING; and then phone/in person to be actually chatting. That's just me though :-D
Thanks for the tutorial!!
OK I love this vest.I hate wearing those t-shirts that come with vest like
ReplyDeletewhat a neat idea!!!
ReplyDeleteYou could also add a nice peace of lace on the back to finish the piece. I love this idea. :D
ReplyDeleteGreat idea Emily! I bet that would look great! Ooo or maybe another tshirt
ReplyDeleteand make a ruched ruffle?? That could be fun too!
Cute idea but it seems like you're missing some steps. Your instructions are quite confusing.
ReplyDeleteIt really is that easy! No missed steps :) Did you check out the diagrams?
ReplyDeleteOnce you put the third slit in you put it on with both arms going through
that slit and it wraps around your back and the thin strip on top goes
around the back of your neck, give it a try I'm sure it will make sense once
you have it in front of you :) Good luck!
How cool...I love this idea!
ReplyDeleteI wish there was a better illustration of where to make the third cut... I still don't understand no matter how many times I read it and look at a tshirt. =(
ReplyDeleteoh i get it, the second picture is the entire piece of fabric. The first picture, you cut through the entire shirt and disregard the sleeves and neck.
ReplyDeleteAwesome! I was trying to figure out a better way to show it.. but I couldn't
ReplyDeletethink of one! Glad you got it! :) Basically you cut straight across to get
rid of the sleeves, then slice it up the side so you have one very wide
piece of fabric. The last step is slicing the line where your arms both go
through. Hope you have fun making one and like it!
Basically you cut straight across under the armpits to get rid of the
ReplyDeletesleeves/neck, then slice it up the side so you have one very wide piece of
fabric. The last step is slicing the line where your arms both go through.
Hope that helps!
This is such cool project! I have a ton of old tshirts that had no use. You just saved them!
ReplyDeleteFAIL!
ReplyDeletei wanna try this but i dont get how :(
ReplyDeleteThank you, you just inspired me to create my own version of the T-Vest!!! God help my T-Shirts I may go scissor crazy!!!
ReplyDeleteI'm sorry I also do not understand this, it's the worst illustration and description ever. :(
ReplyDeleteI have a ? when you make the last cut, how far down do you go? One inch, two inches???
ReplyDeleteIt all depends on how thick you want the neck strap piece to be, i did mine around 1.5 inches but I didn't measure it exactly i just cut where I thought visually looked good :) good luck!
ReplyDeleteI, personally, do not understand how people are confused. Perhaps they are making too much of it.. or the rest of us are that simple-minded? I've made three.. I think it's fantastic. It's most certainly not the worst description or illustration ever. Thank you for sharing!
ReplyDeleteThank you SO MUCH for your kind words!! I can get super discouraged when I get negative comments... I mean why do people have to be so mean?? I REALLY appreciate your kind comment and I'm so glad you understand the instructions and were able to make and enjoy them!!
ReplyDeleteI think it's maybe just people who look at the pictures and don't read. Why? Because I was one. I just kept looking at those red lines like "how the HELL does that make a vest?!" Then I read the directions and realized that, holy hell, I'm going to do this to half my shirts! Ha! Thanks for the idea!! :)
ReplyDeleteHmmm very good point! Glad you read and figured it out! And super glad you like the idea!! :)
ReplyDeleteHey now. It's really really not. If you simply do it, it's really straightforward. I think it is one of those things where you kind of need to see it in person and it suddenly makes sense. But really, it's super easy and I think the above is really a solid description.
ReplyDeleteThanks for backing me up :) The negative comments suck, but it's always the nice ones that make my day!! Thanks!
ReplyDeleteLove it. I just made my first usually I try it once or twice with things like this before I perfect it. I think your long sleeve is just the way to wear it. Thank you!
ReplyDeleteThanks so much! Glad you like it!!
ReplyDeleteI just found this through Pinterest. I'm definitely loving your directions and pictures. I have to say that visualizing a vest from the picture was easy. However, maybe think of it this way. It is pretty abstract. As a math teacher I find that some people just can't visualize this stuff until it's in their hands! (think net diagrams, a picture of a mobius band, etc.) It's not that they can't understand, it's just that they need it in front of them to be able to work with it. Once they figure it out that way, then they are good to go on the diagrams. So try not to take it too personally! :) I can't wait to try this!
ReplyDeleteThanks so much Kristen! I do agree, people learn in all different ways and your examples of learning are spot on!! Sounds like you are a great teacher knowing that fact, so many teachers will only say a theory one way and the kids will never be able to learn.
ReplyDeleteThanks for commenting!
I think what is confusing to people is that it says Slice a Strait line in the Center..and the illistration shows teh cut close to the top of the material.. I had to lok at it a couple of times but I didn't immediatley jump on and be negative.. SMH Thanks For sharing your idea
ReplyDeleteGreat point about how people interpret things! When I said center, I meant left to right as opposed to up and down. I can see how someone could read that differently though. Thanks for visiting!
ReplyDeleteLove this idea.. it made a lot more sense when I linked back to the original poster with a few more pictures...
ReplyDeleteI love it. Your directions were clear and we made two in a couple minutes!!!
ReplyDeleteThanks Karen! So glad you liked it!
ReplyDeleteThis is a great idea. simple and very creative. :) Thanks for sharing. :)
ReplyDeletesuper cute and sooo easy thanks!
ReplyDeleteI just made this vest in less than five minutes....it's three cuts...so simple...definitely going to hit up the thrift stores for some cute t shirts!!! Thinking if you get a size shirt a few sizes larger than you wear it would also be a super cute cover up for summer season! and the top half can be saved to use as a topper for some other clothing project, like a dress of some sort!!!
ReplyDeleteOkay, so I took a bunch of my summer clothes to a second hand store...the kind that buy your used clothes. They rejected about 14 shirts from the huge box of clothes I took there, so I was satisfied. I made these out of the 14 shirts and took them back to the shop....they bought all 14 from me!!!! LOL
ReplyDeleteLove love love you....dorkiness and all!!!!
That is so awesome!! And so funny :) Glad you showed that store who's boss!
ReplyDeleteIts pretty easy... you are only using the lower part of the shirt.
ReplyDeleteOkay I'm an idiot. I didn't get it until I looked at the link under your post, then the stupid light in my head went off. Thanks I love vests and I have tons of t's that have stains but I love the color or the feel of the fabric now I can save them from the dreaded rag bag.
ReplyDeleteBing ! Here goes another explanation...Lay the shirt out flat and cut straight across from armpit to armpit. Discard the neck and arms of the shirt. Next, pick one of the side seams and cut it out. You should now have a large rectangle of fabrick with a seam in the center. So far so good? Now see the original instruction #2 photo.after you make this cut in the fabric...while it is laying on the table, you turn your back to the fabric, put your arms out behind you and slip both hands into the big slit and pull it up your arms. Ta Da. You are wearing a halter vest !!!
ReplyDeleteYou are totally not an idiot, this is just one of those things that's hard to wrap your head around unless you have one right in front of you. Glad you're getting some use out of it now!
ReplyDeleteThanks so much! Always nice to hear a new way of describing things, I'm sure it will help some people understand!
ReplyDeleteLike your friend I was skeptical at first. Nothing that easy can be so awesome. But this vest is so cute!!! And it was sooooo easy. I have to hold back or I won't have any t-shirts left lol
ReplyDeleteThanks so much! So glad you like it :)
ReplyDeleteAwesome, I had nothing summer-y to wear. Made this in 3 minutes now i have a great compliment to any shirt. Thank you.
ReplyDeleteThank you!!! I'm not usually very crafty and this was so easy even I could do it. Wow! You rock sister!
ReplyDeletei totally understand these instructions... super simple!! i cant wait to try this... hmmmmm now which shirt do i want to hack up hahahah
ReplyDeleteClever!
ReplyDeleteMaybe it would have helped the confused people to understand easier if the back picture view demonstrated the strip of cloth at the top.
ReplyDeletegreat tip!
ReplyDeleteMy girls and I just made three! Thanks so much, they love them!
ReplyDeleteI'm so glad you enjoyed it! Thanks for letting me know :)
ReplyDeleteI'm doing this right now and I was wondering whether you cut off the bottom hem and how far in step 2 did you cut the middle cut from the top of the shirt?
ReplyDeleteOop! You said 1.5 inches in the comments.
ReplyDeleteOh no! I just did 2 inches and the strap stretches to the point it is really thin! Might i suggest more like 3 or more next time?
ReplyDeleteMade it in one snip! it's easy once you take your time and do it right. I thought, if she did it in three steps then that's all it takes! If you are plus size you can't do step two in the center. You'll have to cut it closer to the neck line almost centered and you have to cut it wider and make sure it is centered horizontally. I'm going to make so many of these! one in every color lol.
ReplyDeleteu r the best...it is 3:30 in the morning...and I am going to my craft room to make one.....
ReplyDeleteThis is so simple and such a good idea!It's cute too:)Thanks for sharing,I'll definitely be doing this soon:)
ReplyDeleteI just had to go dig through my shirts to find one to cut up. Guess what? I'm back wearing it in a matter of minutes! I love no sew projects!!
ReplyDeleteYes this is what did it for me...I missed cutting the side seam step and then I didn't understand that diagram two was the rectangle of the fabric. Thanks!
ReplyDeleteBRILLIANT! I'm going to try this with regular fabric, too! Thanks so much :D
ReplyDeleteDidn't read through all of the comments (all the drama gets to me, you know?)so I don't know if anyone else thought of this, but I was wondering if there's any way you could take the top part (the shoulders that are discarded) and make a shrug. I was thinking, cut up the middle front, add lace (or maybe strips of fabric from another discard Tshirt) and a single button, maybe make cap sleeves with the same lace, and trim bottom with lace. It's lovely in my mind. LOL
ReplyDeleteI couldn't agree more about the drama! Yikes, who needs it! I think your idea is great though! Thanks for commenting!!
ReplyDeleteI did it yyyyeaaaa!!! now I'm going to teach my 9 year old; dad might run out of t-shirts soon hehehe. it so easy that people can't get it, next time I might move the cutting of the center line in the rectangle a bit higher so the back drop a little lower :-) thank you so much, I think I will make a few of these in every color
ReplyDeleteAwesome!! So glad you like it!! I love the drappy idea for the back! I just did another tshirt redo intoh a drappy back tank top! I bet you'd like it! http://stephchows.blogspot.com/2013/05/rocking-tshirt-redo.html
ReplyDeleteI think you are so creative! Who would of thought of that. Keep up the good work and don't let any negative comments get you down. They are probably jealous they did not think of it first.
ReplyDeleteThis is hideous. And worse...not even functional. A t-shirt is better.
ReplyDeleteI was thinking the same thing! or even gather a soft airy fabric and sew it to the part that you cut off. It's lovely in my mind too!
ReplyDeleteAt first I was confused, when it said "put both arms in cut out", in my head I was wearing it backwards hahaha! My stupid light lit up too for a second, but it made me laugh so it was worth it.
ReplyDeleteYou could also cut the sleeves off and sew them to the top corners to make pockets, and fancy up the pocket with gathers or elastic before you sew them on!
I just made two and both came out perfect! I have teen daughters that LOVE to wear vests!!!! Thanx a million!
ReplyDelete